User Management
Overview
User Roles & Permission
| There are 4 kinds of users. 1) Admin (With SMS), 2) Admin (Without SMS), 3) Privileged User and 4) Normal User. | ||
| 1. | Admin (With / Without SMS) | |
| All Admins are able to edit and manage Public/Private Contacts, Application Message History, Unsubscribe List and Application Settings. | ||
| Admin (With SMS) will be able to perform basic SMS functions (i.e. sending and receiving SMS) on top of the above. | ||
| 2. | Privileged User* | |
| Privileged Users are able to perform basic SMS functions and maintain their own Private Contacts. | ||
| SMS sent by Privileged Users will be of 'High' Priority. | ||
| 3. | Normal User* | |
| Normal Users are able to perform basic SMS functions and maintain there own Private Contacts. | ||
| 4. | Application Message History* | |
| Normal Users and Administrators are able to access Application message history. | ||
| *All Registered Users must be granted 'SMS Access' when being added to the system (See Add Users). | ||
Add Users
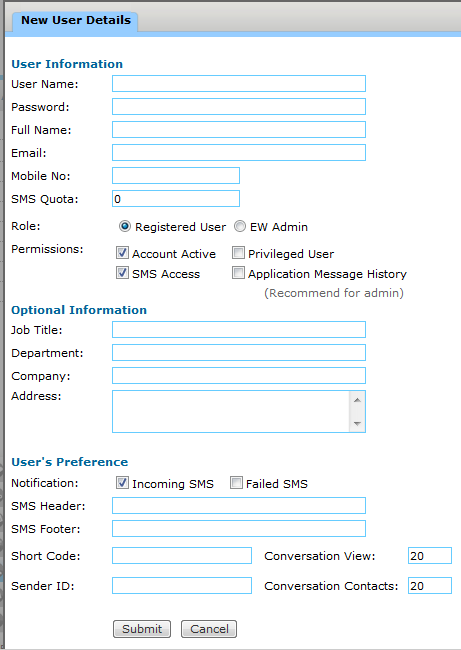
| 1. | Go to Admin> Manage User |
| 2. | Click on the New User button |
| 3. | Type in the necessary information |
| Name , Password , Email & Mobile are compulsory fields. Email will be used for sending password if the user forgets his password. In addition, any incoming SMS will be forwarded to the user's email address. | |
| 4. | SMS Quota: Leave it as 0 for unlimited using. Otherwise, you can put in any numbers to limit the usage. |
| 5. | Click on Submit button. |
| Note: To continue adding another user,
click on Add another button. Go to the contacts view to check out for the newly added contact. |
|
| Optional Fields | |
| Sender ID: If your CustomSenderIDrule has been configured as Database, you will need to provide the Sender ID for each user. | |
| SMS Header: The value will append to the front of all the outgoing SMS content of current user. | |
| SMS Footer: The value will append to the end of all the outgoing SMS content of current user. |
Import Users
| This function is not applicable for Active Directory Authentication. | |
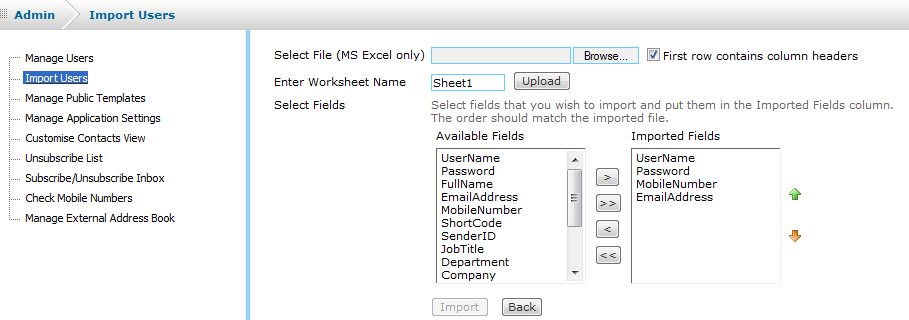
| 1. | Go to Admin > Import Users |
| 2. | Browse for the Microsoft Excel file and indicate the worksheet. |
| Note: You can change the worksheet name from Sheet1 to other names you have specified in your Excel file. Only Microsoft Excel file format is acceptable for the import function. | |
| 3. | Click on Upload button. |
| 4. | Select the fields you want to import. |
| Note: The order of the fields you will specify should relate to the order of the columns in your Excel file. If you have 5 columns in your Excel file, you need to specify 5 fields to be used. UserName, Password, MobileNumber & EmailAddress are mandatory fields. | |
| 5. | Then, click on Import button. |
Manage Users

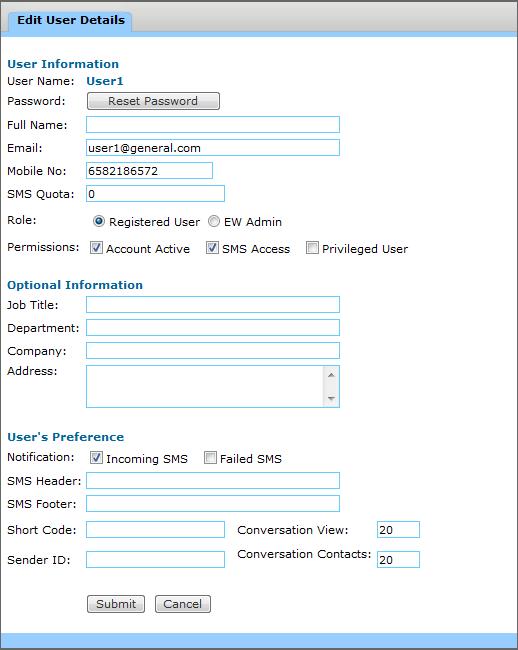
| Edit Users | |
| 1. | Go to Admin > Manage Users |
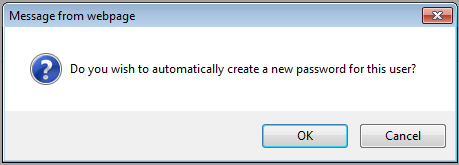
| 2. | Click on the Edit icon
|
| 3. | Now you can edit the Users' Particulars. |
| 4. | The procedure is similar to adding a new User. Make the necessary changes and click on Submit button. |
| Delete Users | |
| 1. | Go to Admin > Manage Users |
| 2. | Click on the Delete icon
|
| 3. | You will be prompted before the system deletes the user. |
| 4. | For multiple delete, check the boxes of the user and click Delete Selected button. |
| Search Users | |
| 1. | Go to Admin > Manage Users |
| 2. | Just -Select One- on the search type. |
| 3. | Type in the keyword. |
| 4. | Click on the Filter button. |
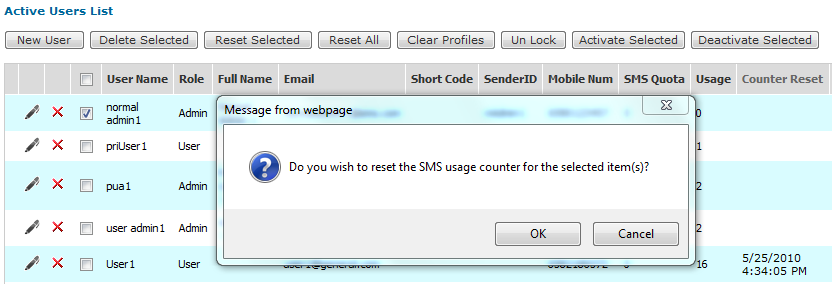
| 1. | Go to Admin > Manage Users |
| 2. | Select the user(s) you want to reset by ticking the checkbox in front of each user record. |
| 3. | Then you can reset the SMS usage counter for the selected user(s) by clicking the Reset Selected button or you can reset for all users by clicking Reset All button. |
| 4. | You will be prompted before the system reset the SMS usage counter to 0 for the selected user(s). |